Processing...
Please wait while we handle the request.
Getting Started with Podseeker
Welcome to Podseeker, your all-in-one podcast outreach platform. This guide will walk you through the complete workflow to help you secure powerful guest appearances for your clients and your brand.
The Podseeker workflow is built on three core pillars that cover the entire outreach lifecycle:
- Find: Use our powerful search and rich data to discover relevant podcasts and evaluate their fit for your campaign.
- Craft: Leverage our AI Co-pilot and your own expertise to create personalized, compelling pitches that stand out.
- Manage: Turn your outreach into an organized, collaborative campaign by sending emails, tracking conversations, and managing your pipeline from a single command center.
Let's dive in and walk through each step.
1. Find & Evaluate Podcasts
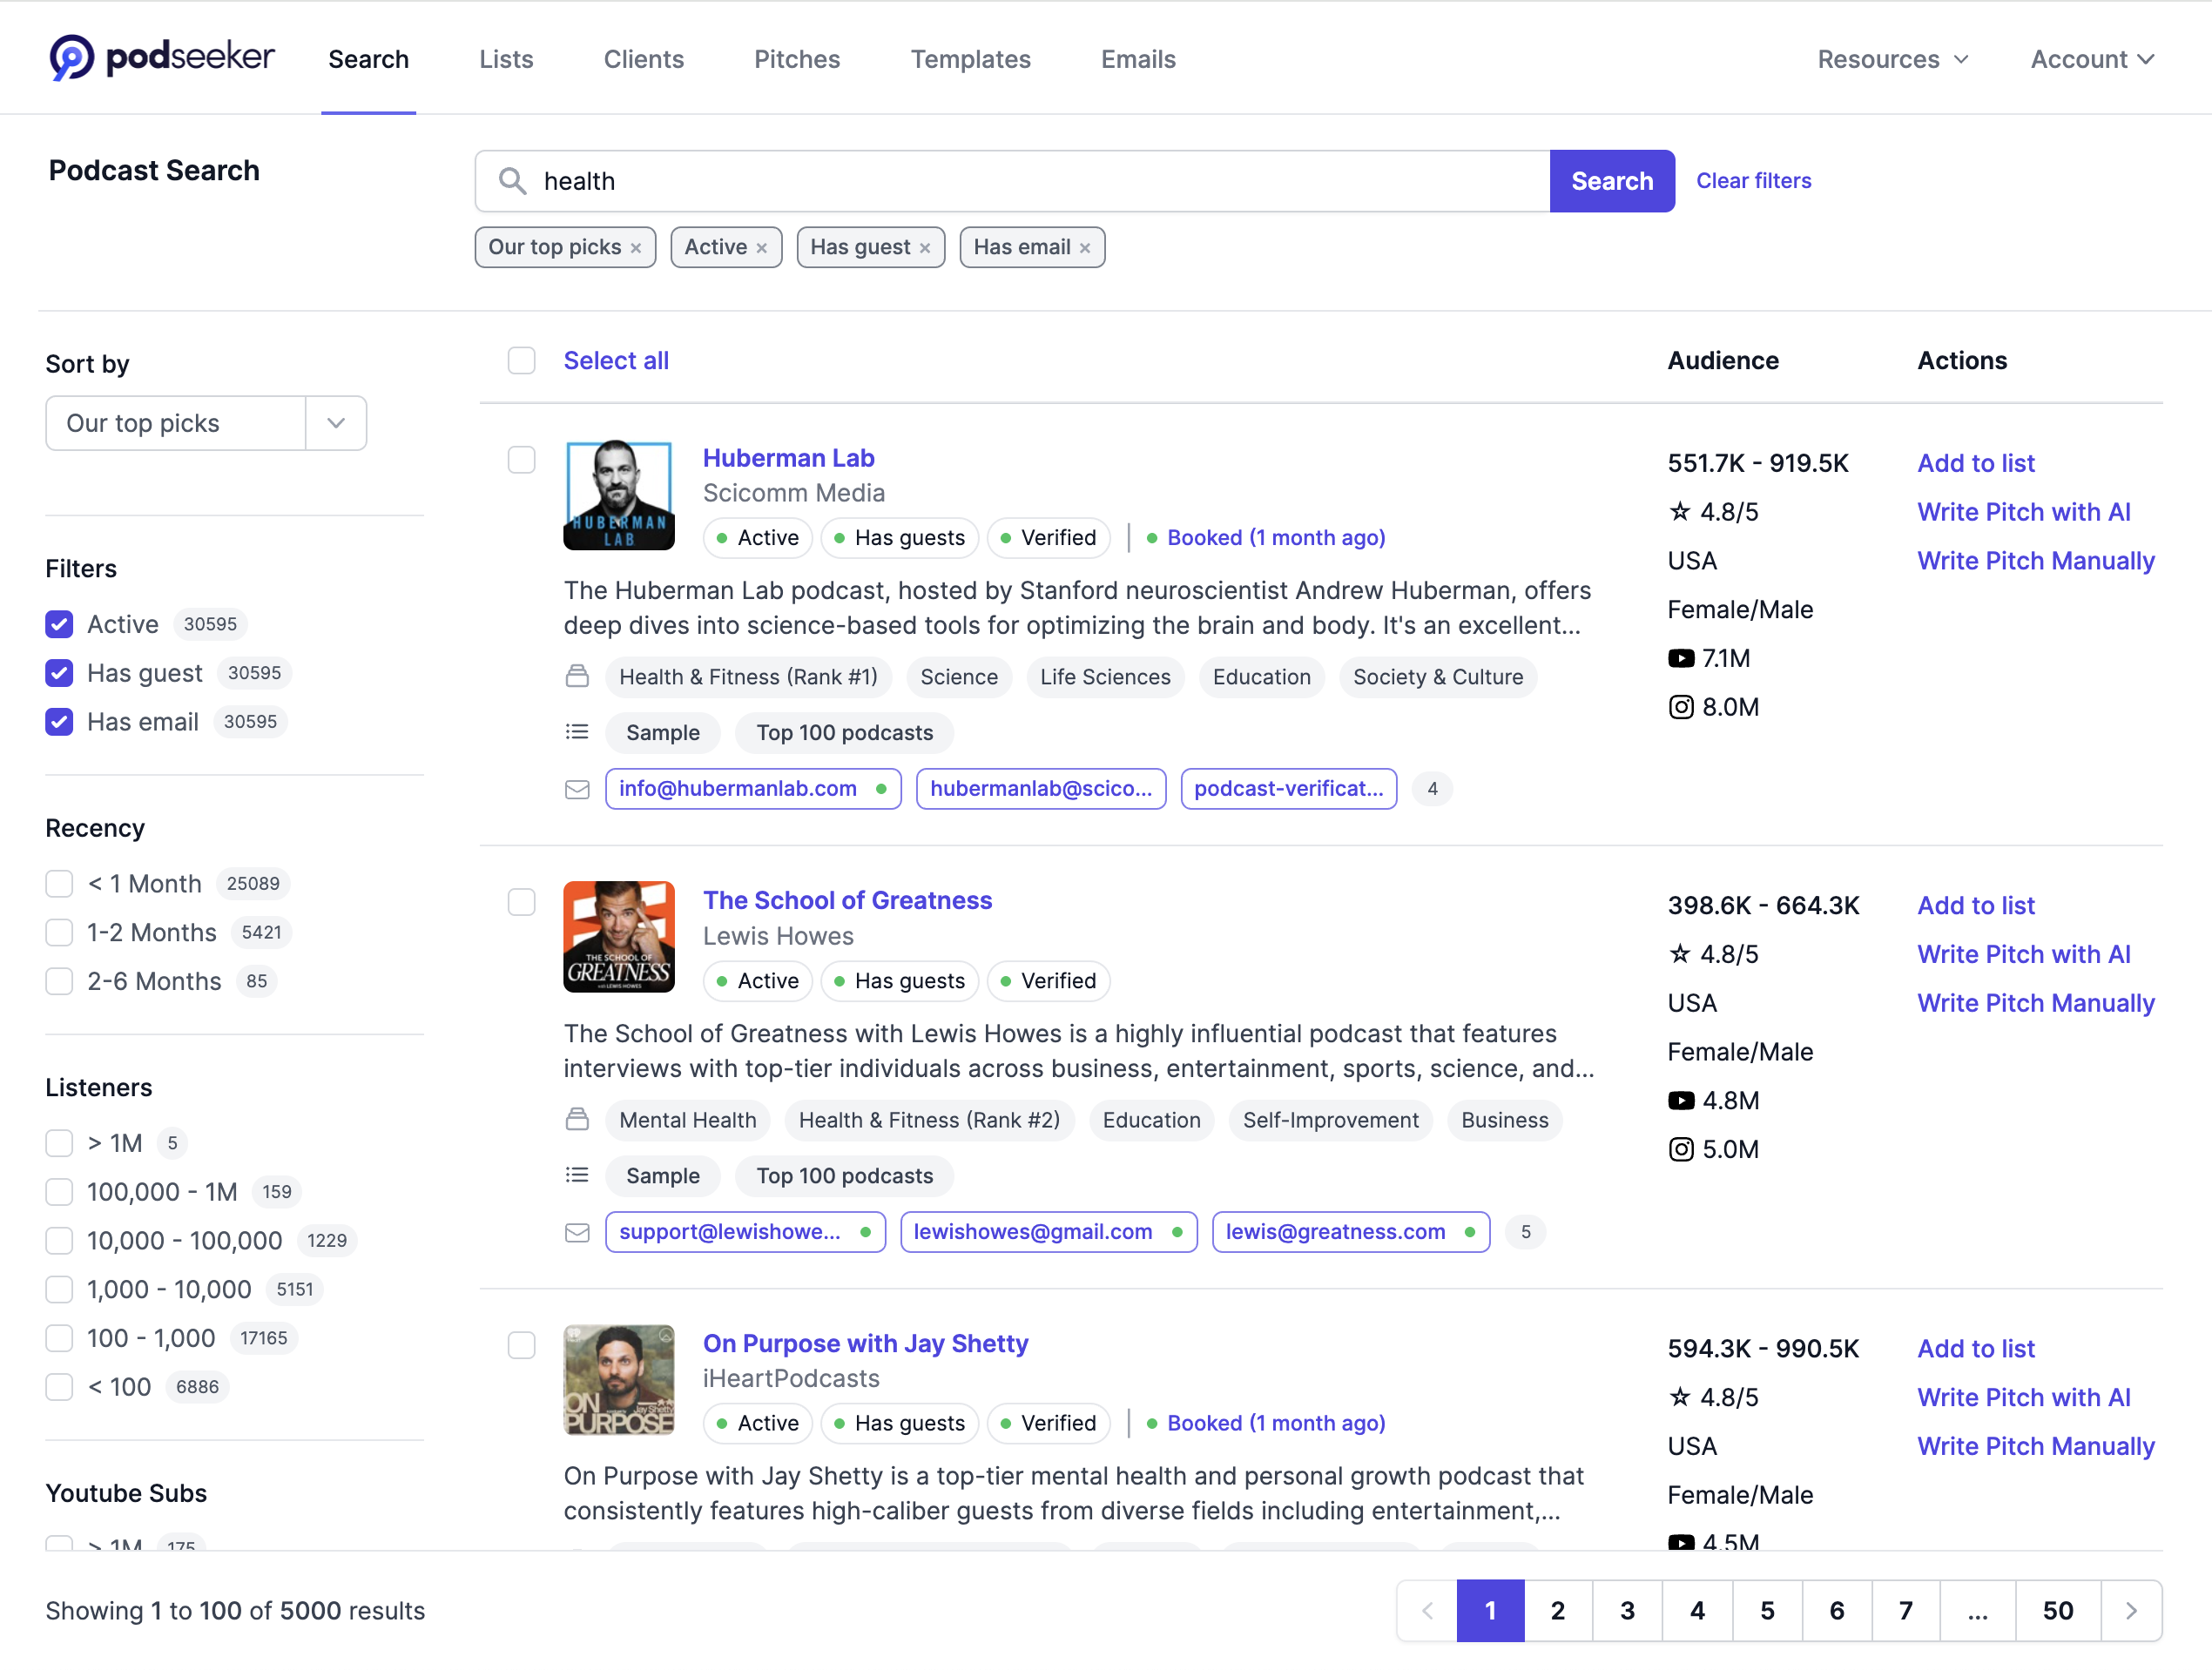
The first step of any successful campaign is building a targeted list of podcasts. Start by navigating to the main Search page.
1.1. Search and Filter
Enter keywords relevant to your niche (e.g., "B2B marketing," "sustainable travel"). To save time and focus on the best opportunities, we recommend starting with these essential filters:
- "Has Guests": Ensures the podcast features interviews.
- "Active": Filters for shows that have published recently.
- "Has Email": Prioritizes podcasts with a readily available contact email.
1.2. Evaluate Podcasts
From the search results, click on any podcast to open its detailed profile page. Here, you'll find everything you need to evaluate its fit:
- Audience Metrics & Demographics: Understand the listener base.
- Recent Guests & Topics: Confirm their content aligns with your client.
- Contact Information: Find verified emails and contact forms.
1.3. Check Team Activity (For Teams)
To avoid duplicate outreach, check the "Team Activity" section on the podcast's profile page. This shows you if anyone on your team has already added this show to a list or has an active pitch, preventing embarrassing cross-communication.
1.4. Save to a Media List
As you find good prospects, click the "Add to List" button to organize them into campaigns (e.g., "Tech Outreach Q3," "Client X Campaign").
2. Craft & Send Your Pitch
Once you have a target, it's time to craft your pitch. Podseeker centralizes this entire process, from creation to sending.
2.1. Set Up Your Tools (First Time)
To streamline your workflow, set up two key things:
- Client Profiles: Go to the Clients page to create reusable profiles for your guests. This saves you from re-typing their bio for every pitch.
- Connect Your Mailbox: Go to Account → Mailboxes to connect your email. This allows you to send pitches directly from your own address and track conversations. We support Google, Outlook, and other providers like iCloud and Fastmail via our Custom IMAP integration.
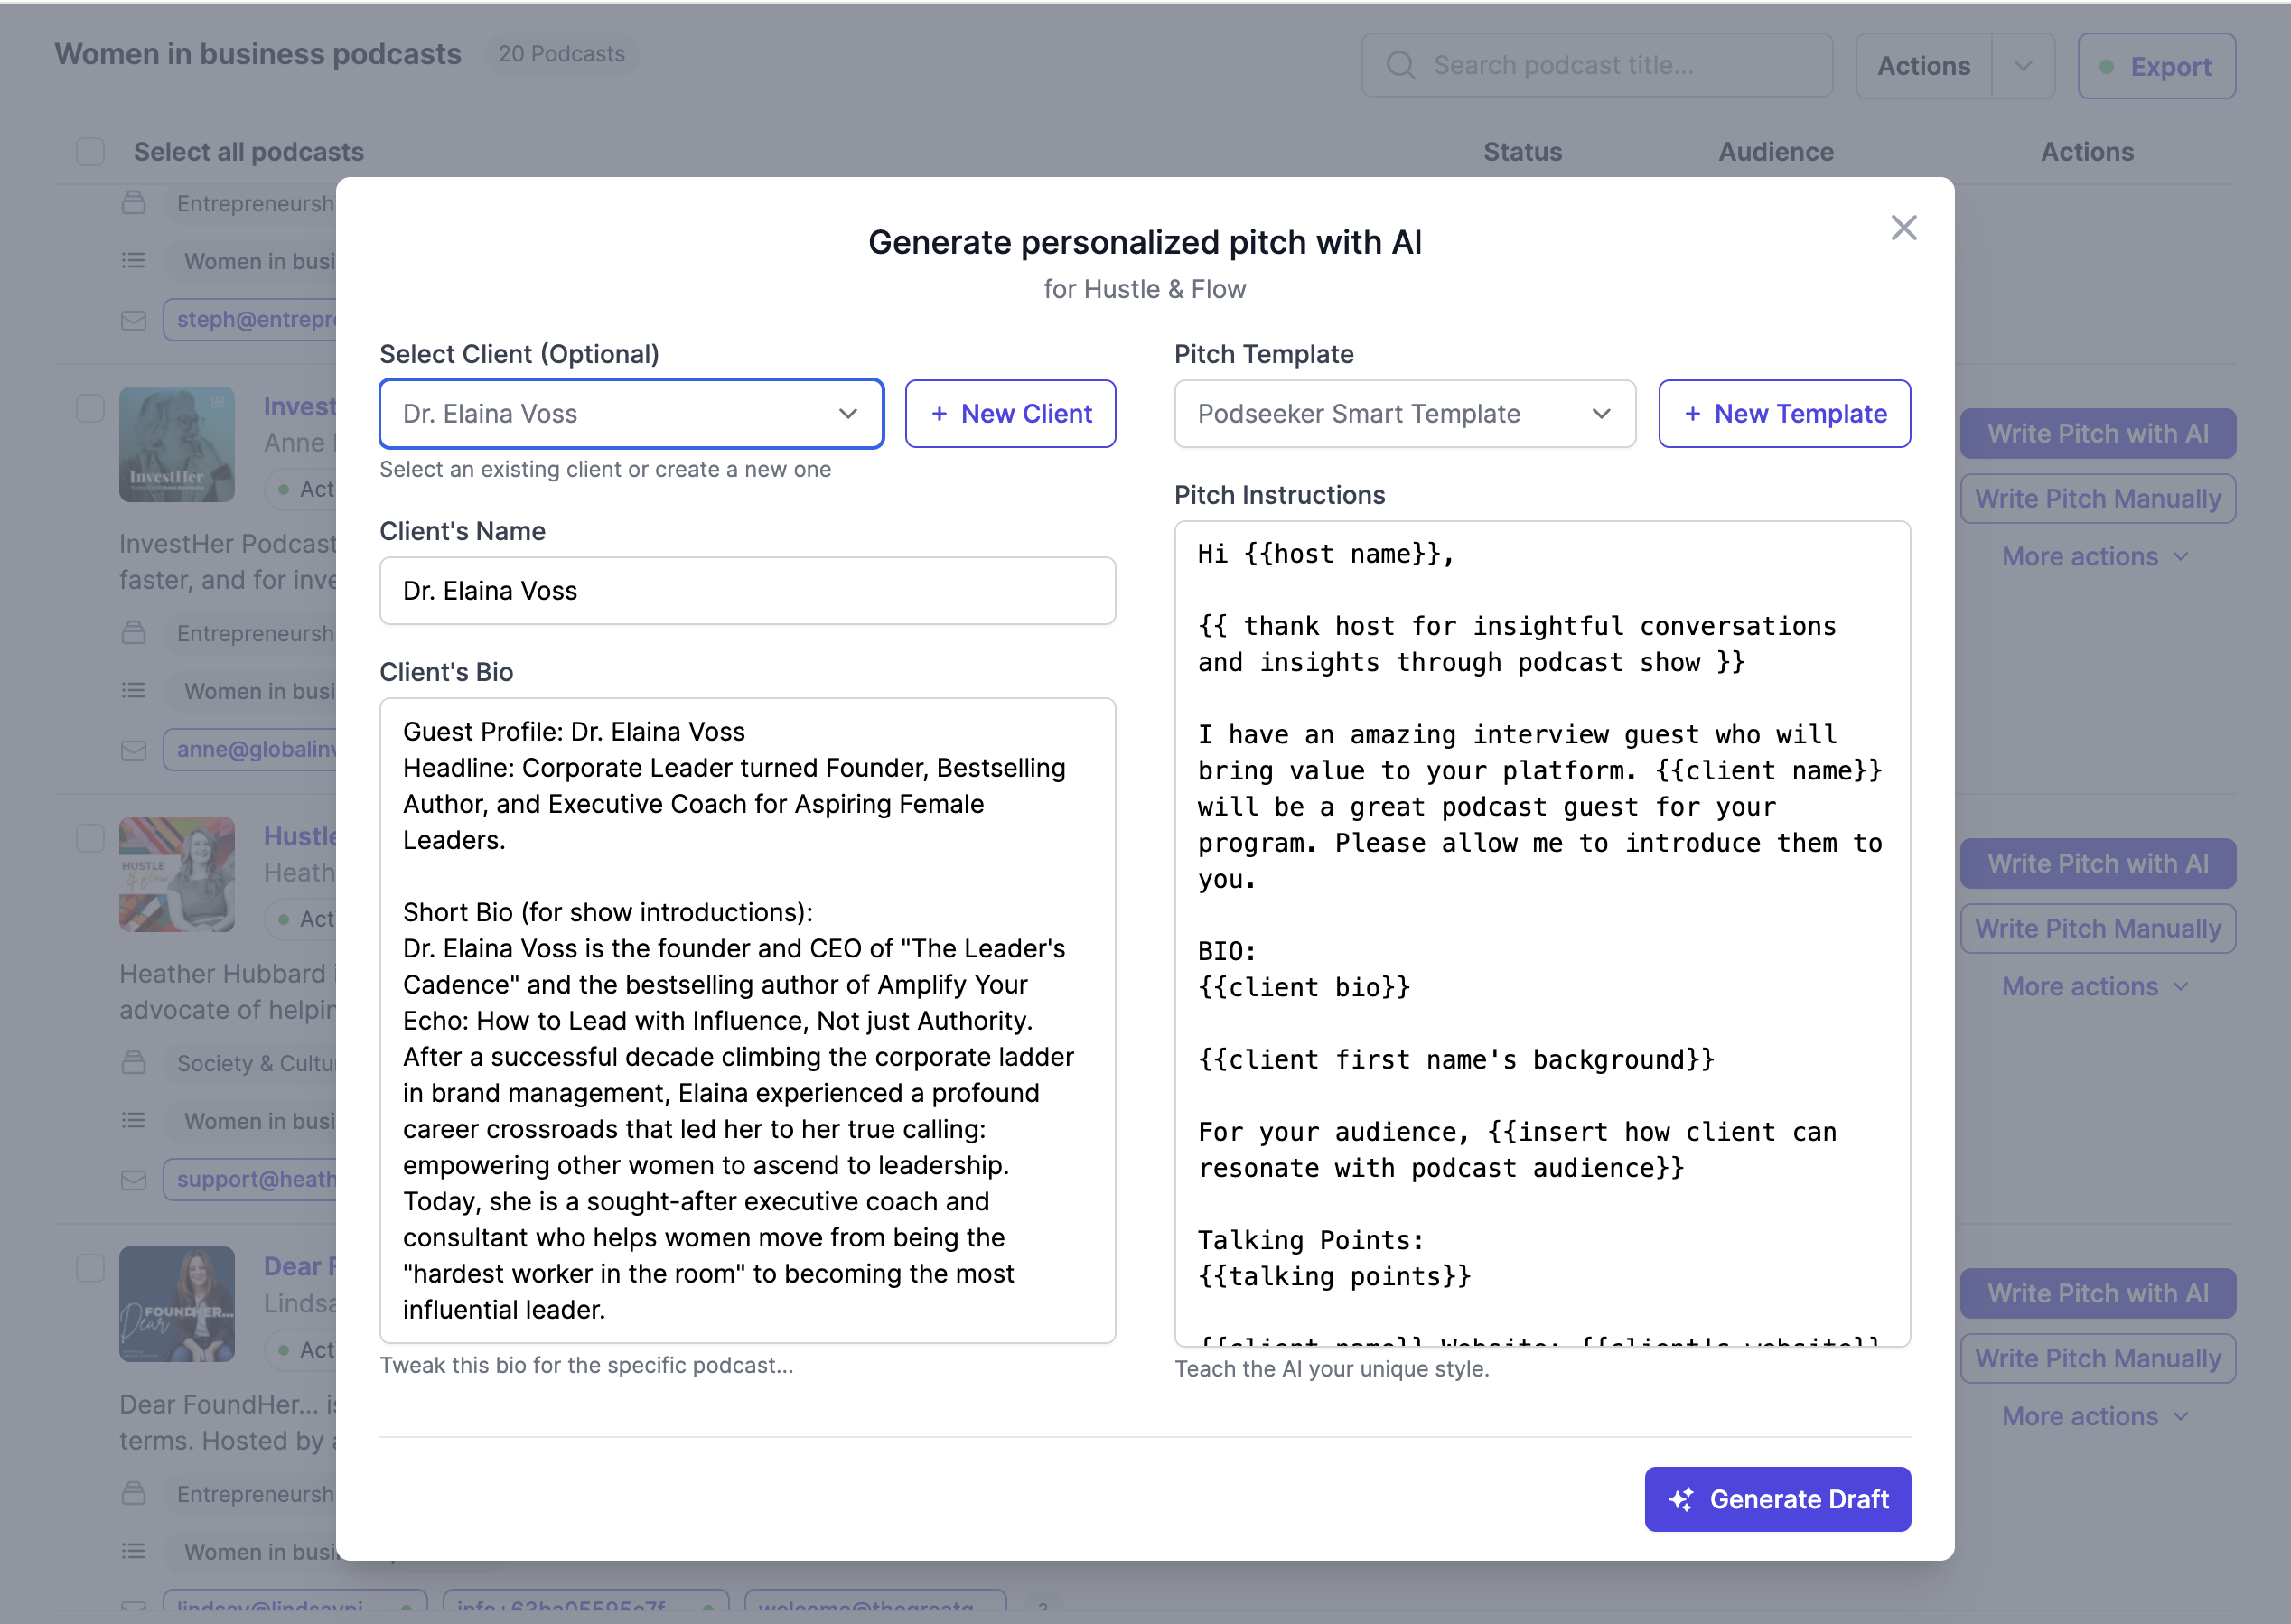
2.2. Create a New Pitch
From any podcast profile page, click "Write Pitch with AI". Select a client (if you've created one) and provide any specific instructions. Our AI Co-pilot will generate a personalized draft for you based on the podcast's recent content and your client's bio.
2.3. Refine and Send
After generation, you'll be taken to the Pitch Workspace. Here, you can review the AI draft, provide feedback to refine it, and edit the text manually. When you're ready, select your connected mailbox, customize the subject line, and click "Send Pitch."
3. Manage Your Campaign
Podseeker's real power comes from turning individual pitches into an organized, trackable campaign.
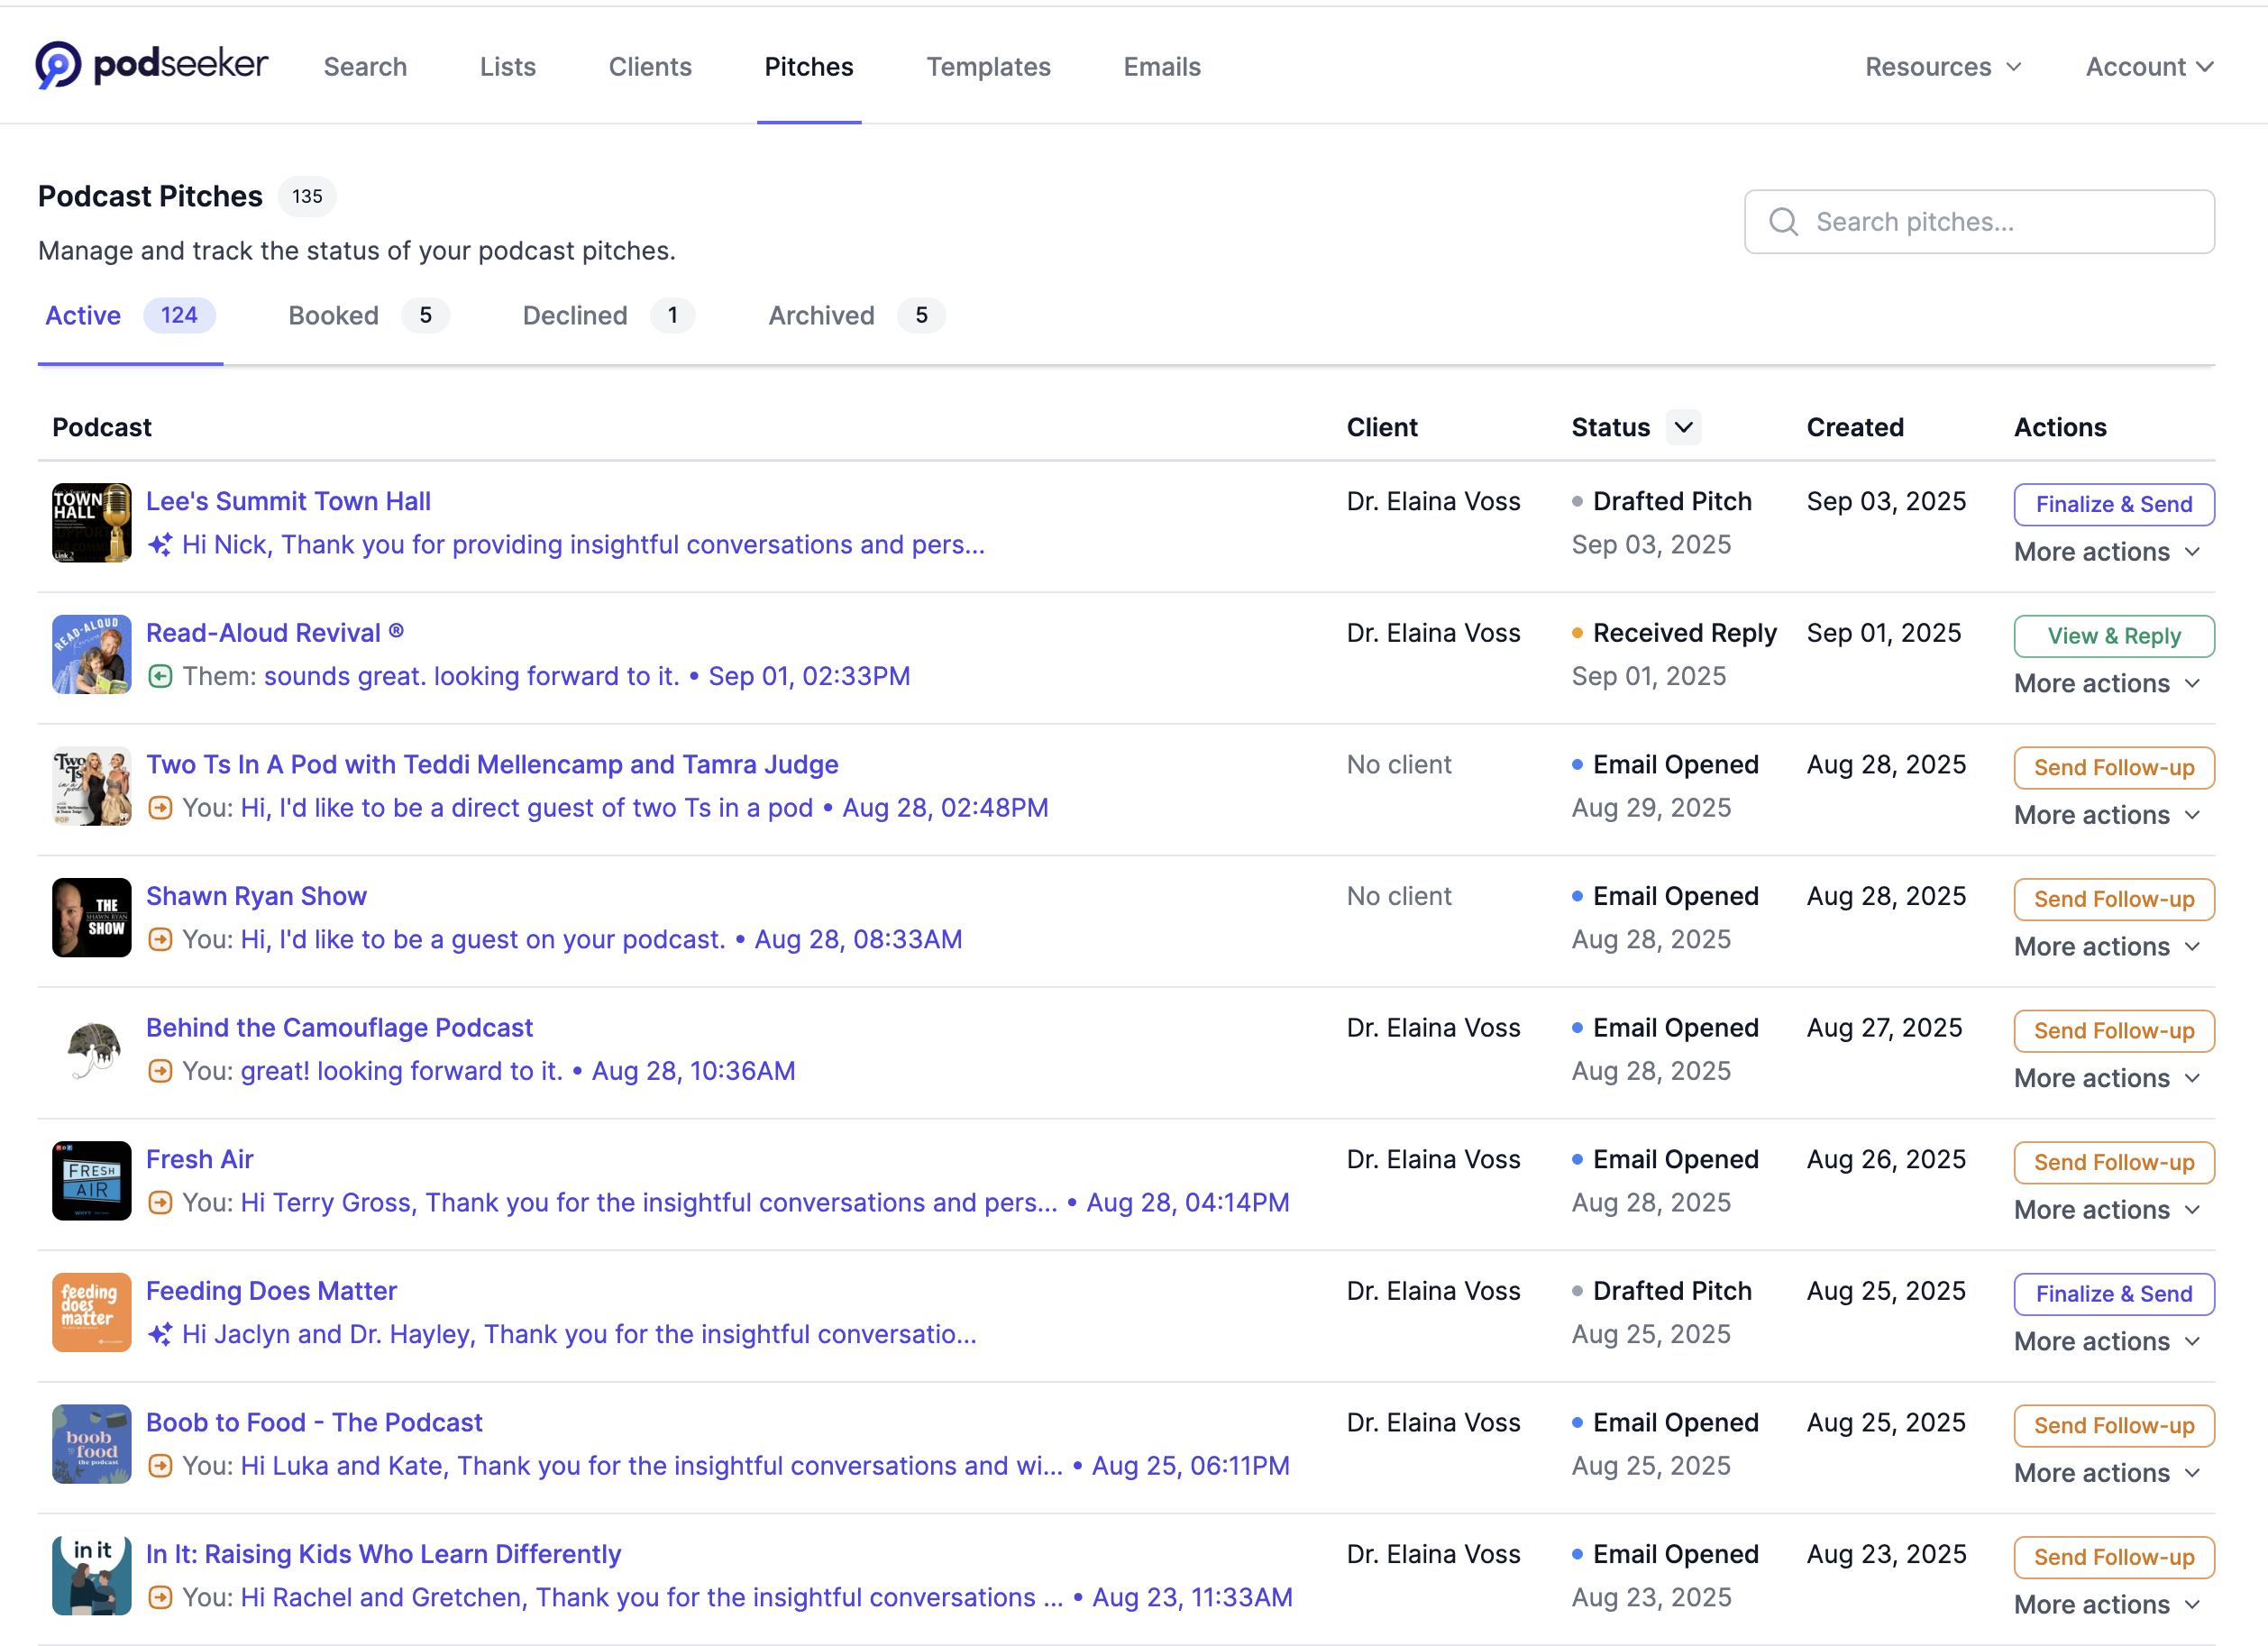
3.1. Your Command Center: The Pitches Index Page
Navigate to the Pitches page in the main navigation. This is your command center. Here you can see every pitch across all your campaigns. You can filter by status (e.g., Drafted, Sent, Received Reply) and see at a glance what needs your attention.
3.2. The Workspace: The Pitch Detail Page
Clicking on any pitch from the index page takes you back to its dedicated Workspace. This is where you manage the entire lifecycle of a single conversation.
- Reply & Follow Up: The primary action on this page is to continue the conversation. A "Reply / Follow-up" button is always available at the top of the conversation panel.
- View the Full Thread: The entire email history is displayed in one place, so you always have full context.
- Update Status: Once the conversation is complete, you can use the "Update Status" dropdown at the bottom of the page to mark the pitch as `Booked`, `Declined`, or `Archived`, keeping your command center up to date.
Conclusion
You now have a complete overview of the Podseeker workflow. By following the Find → Craft → Manage process, you can run professional, effective, and collaborative outreach campaigns all from a single platform.